Step one supplies.
I hit up the big blue lumber and hardware supply box store and got6 8' 2x4's premium grade
10 1/2x7" carriage bolts with a washer and nut for each.
1 section of 1/2" pipe 24in long. (only needed 12 but better to have more just in case)
a tube of gorilla glue
and a 2" wide green ratchet strap 25 or 30 ft long.
after addendum's I also got 2 eyes 3/8" with nuts and fender washers and i used 2 biners with webbing runners

Step 2 Cutting
I cut 5 of the 2x4s into 4' lengths
I put the last one aside for the end. i took a little sand paper and cleaned up the edges and got rid of any splinters.
Step 3 Gluing

I took 6 4'sections and put them on the saw horses and pit the other 4 4'sections aside
then i got out:
a putty knife
a paint brush
a container of water
the glue
and 3 clamps. I wish I had 4 Pipe clamps but a few are awol..
and nitrile gloves
using the paint brush I wet down one side of all 6 boards not soaping wet but good and damp with no puddles or dry spots. I then applied streams of glue and spread it evenly on all the boards at once with the putty knife.

quickly I paired up the boards into one big stack so glue sides were together and had 3 pairs. Once stacked I put on the clamp 2 on one side one on the other and left it to dry till the next day. Being careful to be sure all sides were flush.

I tipped it on it's side so any leaking glue would be on one side and easier to clean.
Step 5 Drilling
The next day after the glue was dry I put 2 of the pairs aside. took the 3rd and did another sanding job to clean up the edges and glue then on 2 of the single lengths and the one double i measured off from 1 end and put a line at:
1'-0"
0'-9"
0'-3"
then drilled a 1/2" hole in the center of each line

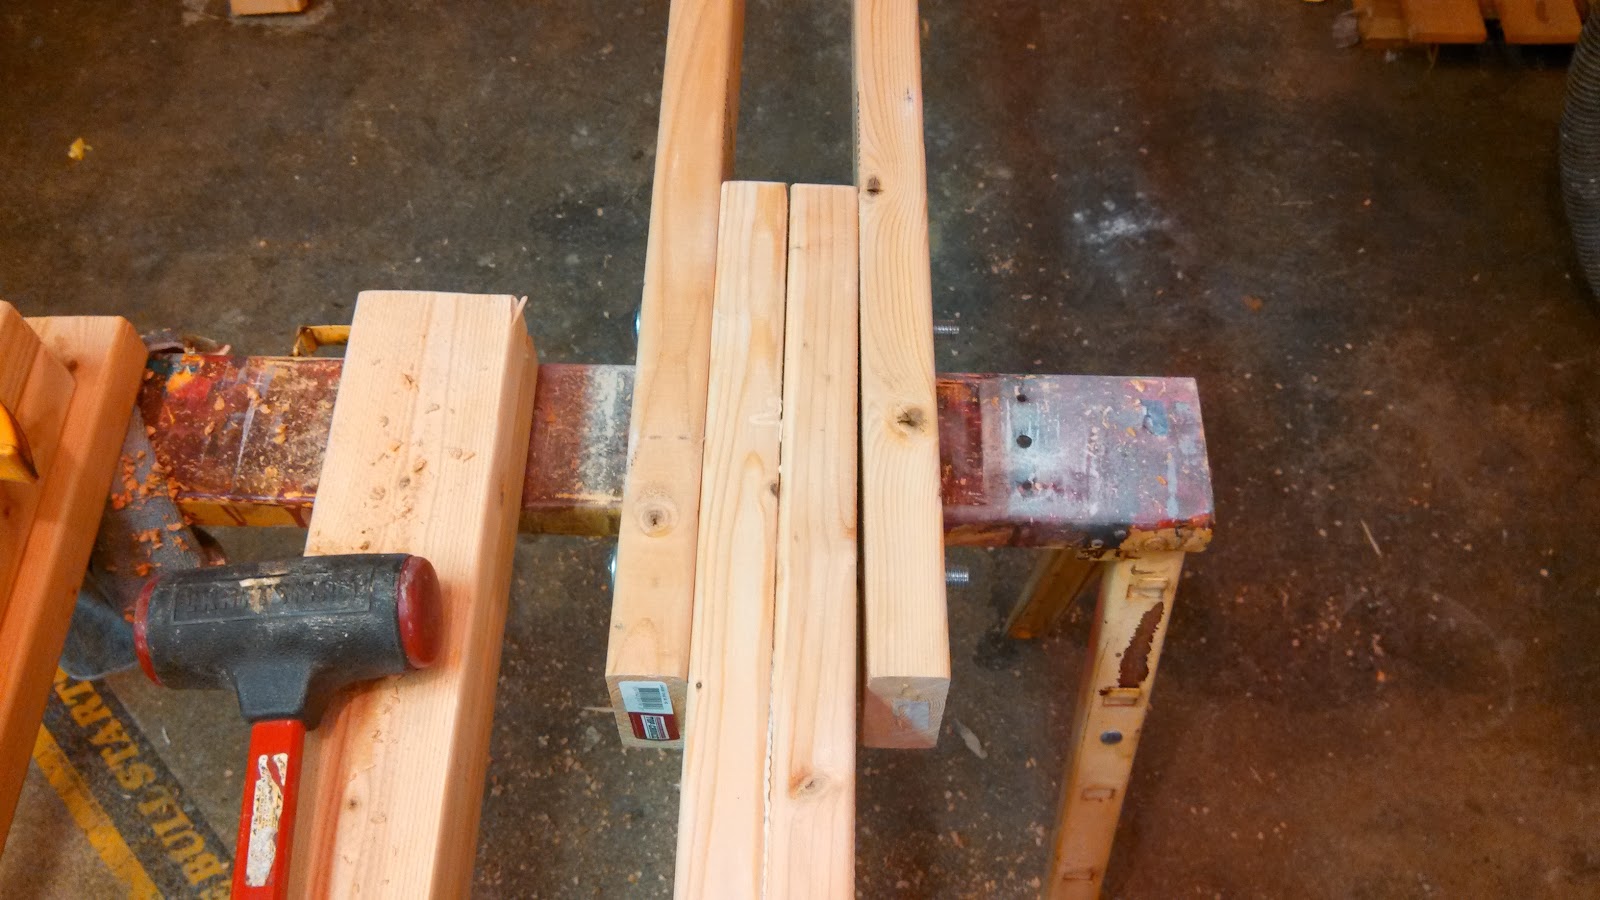 through these holes I put the 3 carriage bolts and made sure it all lay flat
0'-3"
1'-0"
1'-6"
this process was repeated for the other 2 single 2x4s on the other end of the double 2x4.
Step 6 Pipe
I took the length of pipe and cut off the threads at one end then cut 4 3" sections with my abrasive chop saw.


and cleaned off the burrs with the grinder
these get used as spaces.

Step 6 Arms
I took the remaining two double 4' 2x4s and cut a 45 degree angle at one end

and placed it so it rested against the pipe on the bolt at the 1'-0" hole and marked where the 16" hole best lined up on it. and drilled a through hole(note: the arm is not at 45 degrees i just knew I had so cut an angle and that was close enough.

X'-X" from the top of the arm I drill a 3/8" hole though the arm and put a 3/8" eye-bolt with fender washer and nut in eye down.
all holes drilled and fitted. I first loosely assembled the entire then then tightened down all the nuts.
all holes drilled and fitted. I first loosely assembled the entire then then tightened down all the nuts.

Step 7 Feet
I take the remaining 2x4 and cut (2) 2'-0" long pieces
The frame is flipped upside down on the sawhorses and the feet are screwed in place 1' from the end with 4 screws, if i was to truly make this portable I would replace the screws and put threaded inserts into the main frame and countersink bolts into the feet.


The frame is now all assembled. at this point i took a carving attachment for my 4 1/2" grinder and rounded out a 2" section in the center of the ends of the arms to lay the strap in, so as to increase the radius the the strap traveled around and to create a lip so the strap would not slide off.
Step 8 straps.
Due to the length of the arms the slack line want to pull them together.. I need to re-analyse my bolts for the arms to see how to get 2 in each arm to keep this from occurring. lacking that the eye-bolt was added to take a __'climbing runner prussick it to the outbound bar and clip it with a carabiner to the eye-bolt.
then i take my 2" strap and run it from the inside pipe covered bolt over and around to the other side outbound pipe covered bolt. and cinched it down tight.
Step 9, learn how to walk a slackline...
well i guess you practice....

No comments:
Post a Comment